Document Templates
Templates can auto populate information from your records. This is useful for creating things like proposals or invoices.
To create document templates:
1. Click on the wrench.
2. Click on Templates.
3. Click on Document Templates.
4. Click the plus button to add a new document template.
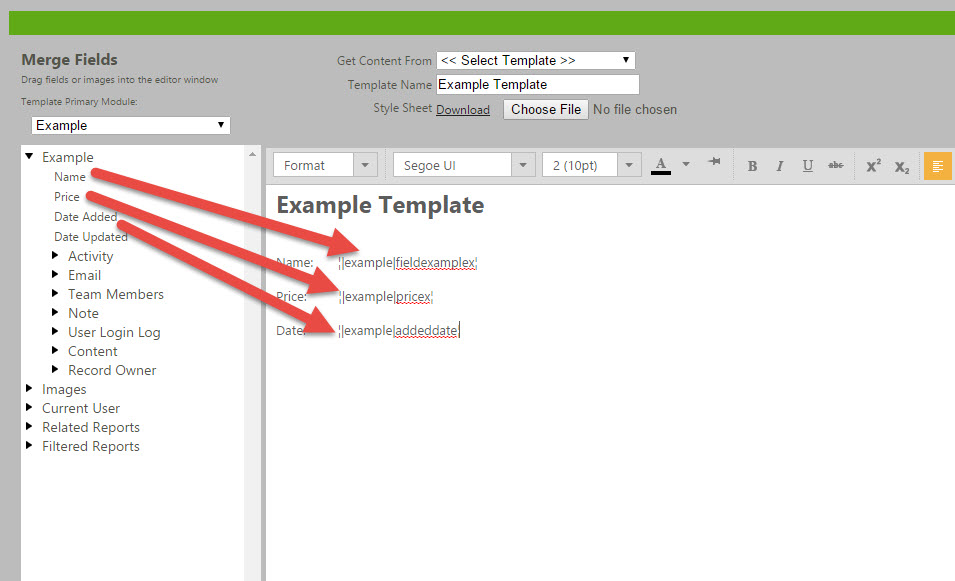
5. Give the template a name. Then select a module to create the template from. This should be the module where you would like to use the template in.
6. You can then create the document. You have the option to copy and paste html code if you have created a template in another program. To do this, click on the small symbol in the bottom-left corner of the editor. There, you can edit the html code.
7. You can pull in fields if you would like to have information auto populate. Just open the module on the left side by clicking the next to the module name. This will display all of the fields in that module. You can then click and drag the field from the left to your document. The field will go where you have your cursor.
8. You also have the option to pull in PLI Tables. These are made for modules with a one-to-many (template) relationship. This table will populate with all of the related records. The fields from the line item module need to be pulled into the tables second row. For example if you have products connected to an opportunity you can pull all of them into a PLI table to create an invoice. You will need to drag in the fields to make the column headers like Product Name, Price, quantity, and any other headers you would like to have. Decide how many columns you need in the PLI table, this is how many fields you can drag in. Open the Misc section, then click and drag the appropriate PLI table. You can then rename the headers and drag the fields in to the table.
9. Make sure you select a Template Label. If there are no labels, you must create one by clicking "new". Click "Save" when you're finished.